DAHDI Config
Overview
The DAHDI module is designed to let you manage and configure your PSTN cards. The module currently supports Allo, Digium, OpenVox, Rhino and Sangoma Cards. DAHDI is the software drivers that connect your PBX to your PSTN using Analogue, T1/E1/PRI or BRI’s.
Logging In
- From the top menu click Connectivity
- In the drop down click DAHDI Config
When you log into the DAHDI module in IC-Talk HC the first time, the system will warn you that if you continue and enable the module, any existing setup you have for any DAHDI cards that you set up manually will be lost and overridden.
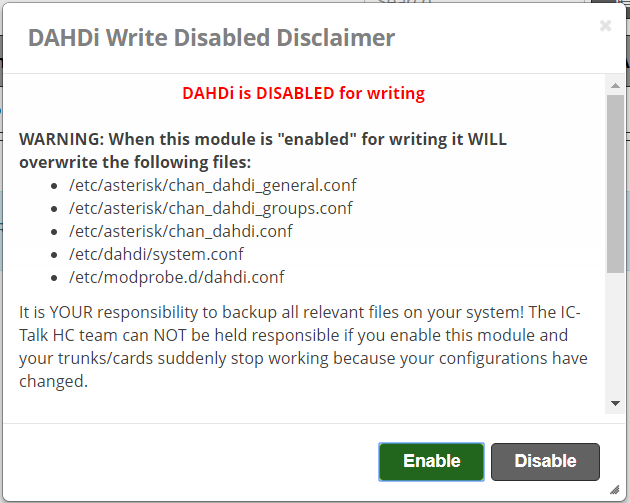
Clicking "Enable" should bring you into the DAHDI module and auto-detect any cards you have installed, as seen below.

General Settings
General settings deal with settings that apply globally to DAHDI. Most people never need to change or adjust these settings, but if any changes you would normally make to DAHDI configs are needed, you can adjust or add them here.
The main sections under the "settings" category are:
- Global Settings
- System Settings
- Modprobe Settings
- Module Settings
- Sangoma Settings
Global Settings
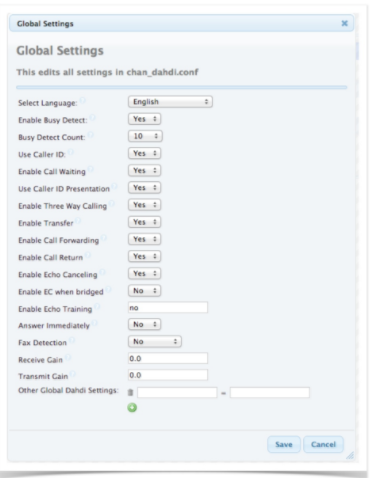
The Global Settings section lets you set common DAHDI settings for Asterisk. We set the common settings to recommend defaults, but you can change any of the following settings or add your own custom settings to be included in the chan_dahdi.conf config files.
Select Language
Select from all supported languages for DAHDI.
Enable Busy Detect
On trunk interfaces (FXS) and E&M interfaces (E&M, Wink, Feature Group D etc.,) it can be useful to perform busy detection, either in an effort to detect hangup or to detect busy. This enables listening for the beep-beep busy pattern and then hanging up the call.
Busy Detect Count
If this is enabled, it’s possible to specify how many busy tones to wait for before hanging up. The default is 3, but it might be safer to set to 6 or even 8. The higher the number, the more time will be needed to hang up a channel, but a higher number will also reduce the probability that you will get random hangups.
Use Caller ID
Whether or not to use caller ID
Enable Call Waiting
Whether or not to enable call waiting on internal extensions. With this set to “yes,” busy extensions will hear the call-waiting tone and can use hook-flash to switch between callers.
User Caller ID Presentation
Whether or not to use the caller ID presentation for the outgoing call that the calling switch is sending.
Enable Three Way Calling
Support three-way calling on FXS extensions.
Enable Transfer- Support Flash
Hook call transfer (requires three way calling.)
Enable Call Forwarding
Support call forward variable.
Enable Call Return
Whether or not to support call return *69 from the carrier.
Enable Echo Cancelling
Note that if any of your DAHDI cards have hardware echo cancellers, then this setting only turns them on and off. There are no special settings required for hardware echo cancellers; when present and enabled in their kernel modules, they take precedence over the software echo canceller compiled into DAHDI automatically.
Enable EC when Bridged
Generally, it is not necessary (and in fact it is undesirable) to echo cancel when the circuit path is entirely TDM. You may, however, change this behavior by enabling the echo canceller during pure TDM bridging below.
Enable Echo Training
In some cases, the echo canceller doesn't train quickly enough and there is echo at the beginning of the call. Enabling echo training will cause DAHDI to briefly mute the channel, send an impulse and use the impulse response to pre-train the echo canceller so it can start out with a much closer idea of the actual echo. Value may be "yes," "no" or a number of milliseconds to delay before training (default = 400.) In some cases this option can make echo worse! If you are trying to debug an echo problem, it is worth checking to see if your echo is better with the option set to “yes” or “no.” Use whatever setting gives the best results. Note that these parameters do not apply to hardware echo cancellers.
Answer Immediately
Specify whether the channel should be answered immediately or if the simple switch should provide dial tone, read digits, etc.
Fax Detection
Whether you want to try and detect if a call is a voice or fax call. Options are “yes,” “no,” “incoming” and “outgoing.” We recommend settings this to “no” unless you want to detect fax calls, then set it to “incoming.”
Receive Gain
The values are in db (decibels). A positive number increases the volume level on a channel and a negative value decreases volume level.
Transmit Gain
The values are in db (decibels). A positive number increases the volume level on a channel and a negative value decreases volume level.
Other Global DAHDI Settings
Here you can set any custom DAHDI settings and the value. You should only use this option if you know what you are doing with DAHDI.
After making changes here, make sure you press the "Apply Config" button at the top.

Then press the "Reload DAHDI/Asteirsk" button at the bottom of this page. These changes DO NOT require a restart of Asterisk or DAHDI.

System Settings
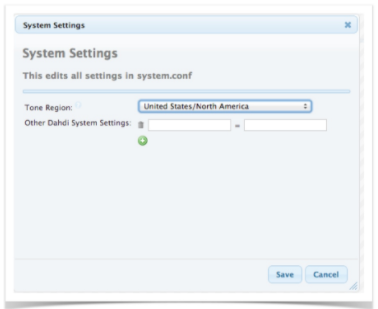
The System Settings section lets you set common DAHDI system.conf settings. You almost never have to change these or add any unless instructed by someone to add or change a DAHDI system.conf setting.
Tone Region
Please choose your country or your nearest neighbouring country for default tones.
Other DAHDI System Settings
Here you can set any custom DAHDI settings and the value that you would normally put in system.conf file. You should only use this option if you know what you are doing with DAHDI, know what each option does and know how it interacts with all the other options.
After making changes here, make sure you press the "Apply Config" button at the top.
Then press the "Restart DAHDI/Asterisk" button. These changes DO require a restart of Asterisk or DAHDI, and all active calls on your system will be DROPPED!

Modprobe Settings
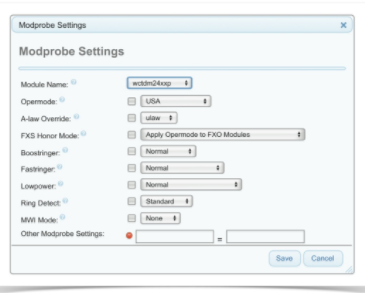
The Modprobe Settings let you control the Linux systems used to manage drivers. You can change value and options for each DAHDI kernel module, or driver. Different models of cards have different kernel module settings and you should only change these if instructed by the manufacturer of your card or support. Also consult the manufacturer as because you'll need to change the settings in this section.
Module Name
Specify the kernel module used by the installed analogue hardware. Each module has a specific set of settings as it relates to that module, so please contact the manufacturer for more information on each setting.
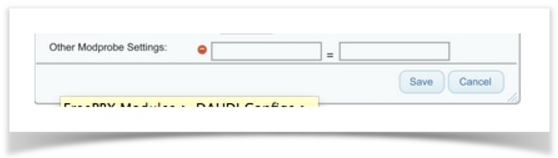
Custom Settings
Lastly you can include new custom modules at the bottom of the file.
Then press the "Restart DAHDI/Asterisk" button. These changes DO require a restart of Asterisk or DAHDI, and all active calls on your system will be DROPPED!
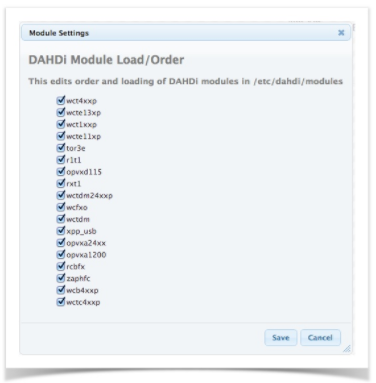
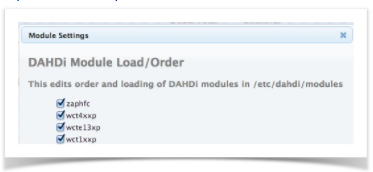
Module Settings
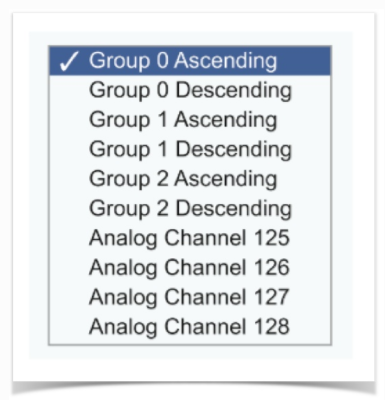
In the module settings you can define which kernel modules should be loaded for your cards. By default we set all the common cards we configure but you can add custom entries here or disable or move the order of how the modules are loaded.
Clicking on this section will bring up all the modules that we autoload.
From here you can disable any modules that you do not need if you want. In our example we removed a handful of modules by un-checking them and pressing the save button.
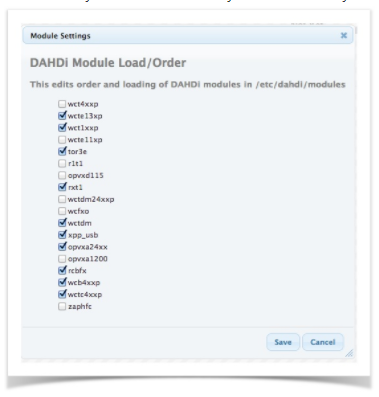
You can also drag and drop the order of the modules and how DAHDI will load them. This is not usually needed except rare circumstances. You will see in the example below we moved zaphfc to the top.
After making changes here, make sure you press the "Apply Config" button at the top.
Then press the "Restart DAHDI/Asterisk" button. These changes DO require a restart of Asterisk or DAHDI, and all active calls on your system will be DROPPED!
Sangoma Settings
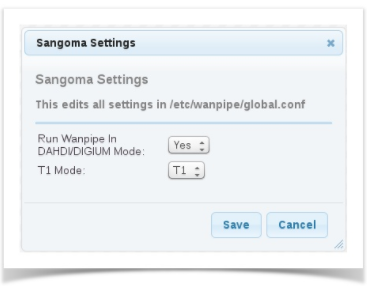
The Sangoma Settings section is related to Sangoma Cards only. Since Sangoma cards use their own drivers in front of Asterisk, with Sangoma Settings you will be able to manage these parameters:
Run Wanpipe in DAHDI/DIGIUM Mode
You need to set this to Yes if you wish to manage your Sangoma cards in this module along with PSTN cards from other manufacturers on the same system.
T1 Mode
Pick whether the T1 cards run in T1 or E1 mode.
Then press the "Restart DAHDI/Asterisk" button. These changes DO require a restart of Asterisk or DAHDI, and all active calls on your system will be DROPPED!
Digital Card Setup
Here is where you can see all Digital Cards on the system. Digital cards can be T1/E1/PRI, BRI and Sangoma GSM Cards.
In our example below we have a Digium T1 Card, Sangoma 2 Port BRI card and a Sangoma GSM card.
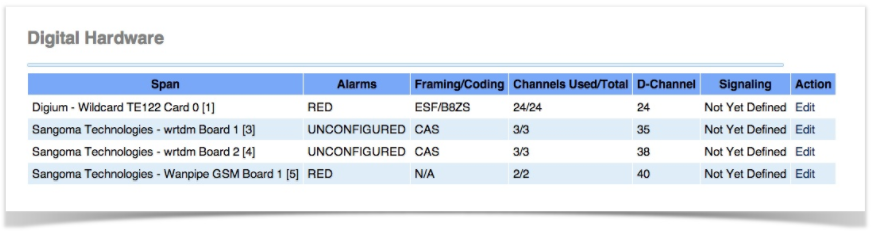
Click on the Edit button next to each digital card span. One single digital card span represents one port on a T1/E1/PRI Card or BRI card, and you can configure the settings for each port. The settings are dynamic depending on the type of card such as T1 versus BRI. You will also see that signaling is “Not Yet Defined,” which means the card has not been configured yet. The port on the card will not work until you click on "Edit" and save the settings.
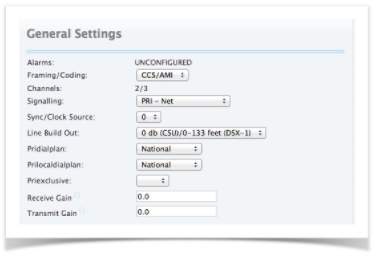
T1/E1/PRI and BRI Settings
General Settings
In General Settings, you can define all the different information as it relates to your specific carrier setup, such as signaling and switch type.
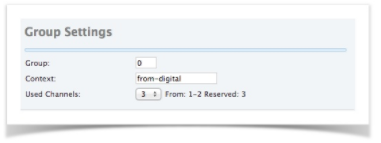
Group Settings
When setting up a DAHDI card, you break channels (T1 or analog) into groups shorthand known as g0 for group 0. In our example we are going to set up our the Digium T1 cards Port 1 as group 0. We are also going to set up the other 2 ports on the Sangoma BRI card as group 1. Lastly we will set up the GSM card as group 2. You can pick and choose which groups to put your ports of a card under. Then when creating your trunks in the IC-Talk HC GUI, you define which groups each trunk uses for outbound calling.
GSM Card
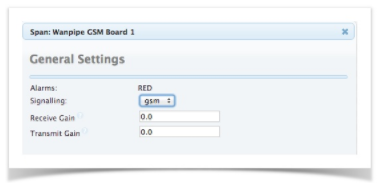
General Settings
Here you can define the signalling type and your gain adjustments (up or down).
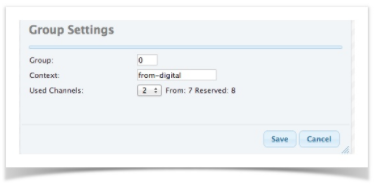
Group Settings
When setting up a DAHDI card, you break channels (T1 or analog) into groups shorthand known as g0 for group 0. In our example we are going to set up our the Digium T1 cards Port 1 as group 0. We are also going to set up the other 2 ports on the Sangoma BRI card as group 1. Lastly we will setup the GSM card as group 2. You can pick and choose which groups to put your ports of a card under. Then when creating your trunks in the IC-Talk HC GUI, you define which groups each trunk uses for outbound calling.
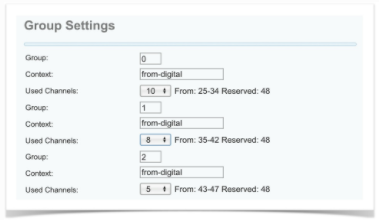
You can also set up ranges of channels on your T1 to be different groups for different companies or divisions.
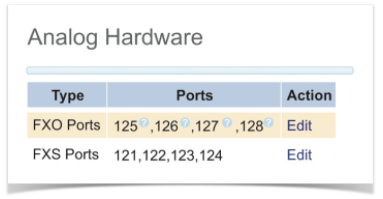
Analog Card Setup
For an analog card we will display each port on the card under the “Analog” section. Ports on an analog card are either FXO or FXS.
FXO
FXO are ports on the card that you connect to your phone lines from your telco.
FXS
FXS are ports you can plug analog extensions into and create DAHDI endpoints or phones in your PBX to use those FXS ports.
In the example below, we have both FXS and FXO cards installed. We can see what port number they are in DAHDI. DAHDI will load digital cards first and assign them channel numbers starting from 1, then load FXO and FXS channels. As we can see below, FXO ports on our setup are 125-128 and FXS are 121-124.
FXO Channel Setup
Clicking on the “Edit” button next to FXO should give us a screen like this. From here, the only thing you would normally change is the group that analog port belongs to. Just like with digital cards, any port can belong to any DAHDI group such as group 0.
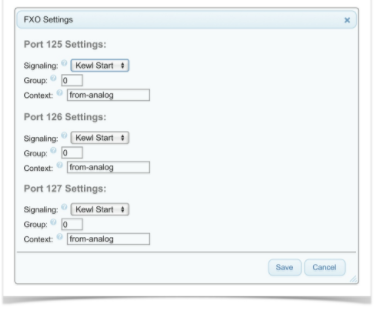
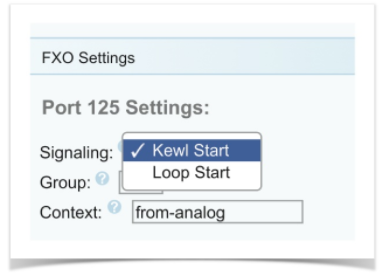
The signalling can either be “Kewl Start” or “Loop Start,” but most of the time it will be “Kewl Start." The context for your PBX should always be “from-analog,” so do not change this unless you know what you are doing.
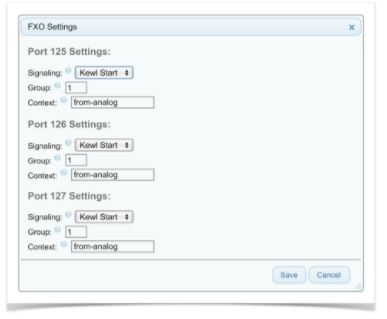
We will set up our 3 FXO ports on our PBX as Group 3 since we are using group 0-2 for our Digital Cards. This way, when we set up our trunks we will tell the PBX to always try groups 0-2 lines first and only fail to group 3 if the call can not be processed on any of the Digital Cards that were all assigned to group 0-2.
FXS Channel Setup
Clicking on the “Edit” button next to FXS should give us a screen like the one below. From here, the only thing you would normally change is the signalling type, but this should almost always be “Kewl Start.”
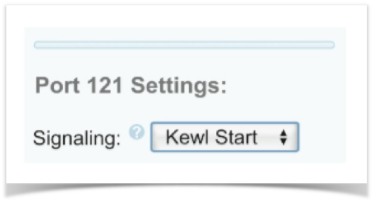
All other settings for an FXS channel are done when creating your extension in the PBX DAHDI extension setup since each FXS channel is mapped to an extension on the PBX.
Now that you have setup your cards, make sure you go into the Trunks module in your PBX and create your trunk. When creating a trunk, you will be given a drop down of which group you want that trunk to be paired with based on what groups you created in this module.