Auto Attendant Plus
Auto Attendant Plus
Description
Auto Attendant Plus adds enhanced call forwarding functions when applied to the selected Auto Attendants through the Business Portal.
Function
The enhanced functionality allows greater flexibility in how an Auto Attendant can be deployed by providing the following advanced call forwarding functionality:
- Alternate Numbers
- Call Forwarding Always
- Call Forwarding Selective
- Do Not Disturb
- Selective Call Acceptance
- Selective Call Rejection
- Voicemail
Configuration
- Navigate to Sites (Select Site) > Features > Auto Attendants (select Auto Attendant if existing or Create a new one by clicking + Add). You can also navigate to an existing Auto Attendant from the Site Dashboard.
- Scroll down to the Feature Package box
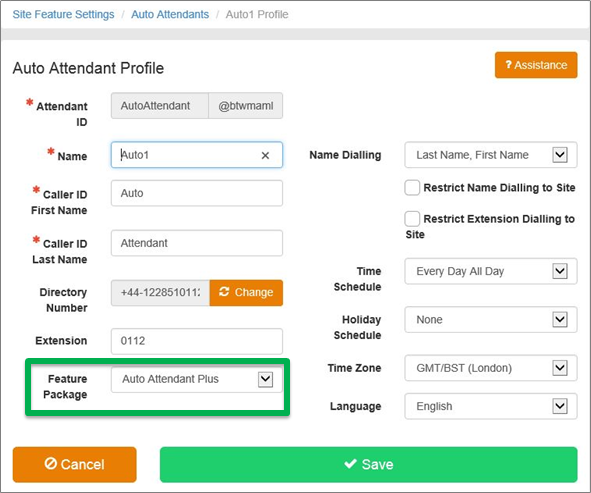
- Select Auto Attendant Plus followed by Save
Configure the Settings
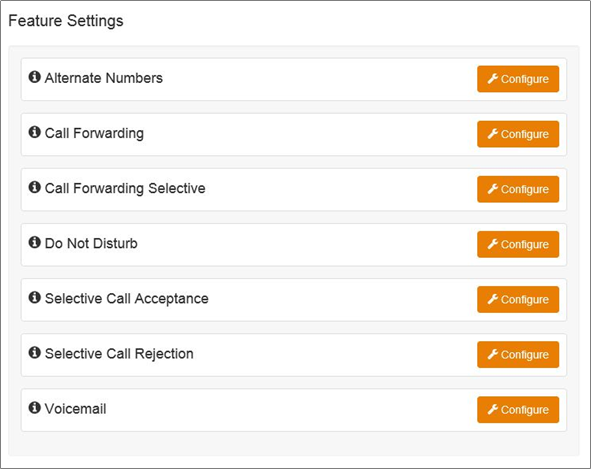
- Select Feature Settings from the Auto Attendant Profile box on the left-hand side to see all of the available options:
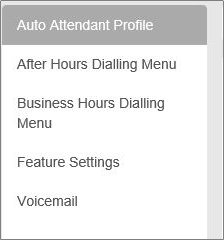
Clicking on the Feature Settings option will allow the administrator to then see and configure the feature settings:
Alternate Numbers
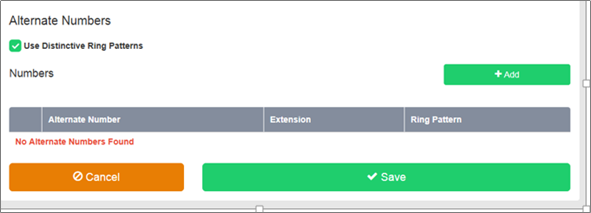
Allows an Auto Attendant to accept incoming calls from up to 10 other incoming numbers not already assigned to another user or feature. This is ideal for when an Auto Attendant is advertising different geographic numbers in different regions, all pointing to the same team managing the Auto Attendant. There is a choice of 4 Distinctive Ring Patterns that can be assigned to each Alternate Number to assist Auto Attendant Users in distinguishing audibly between the Alternate Numbers being dialled. Please note, all calls made to an Alternate Number will be seen in the CDR’s.
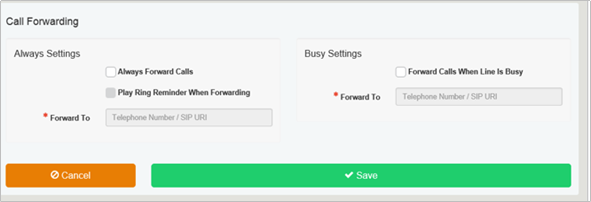
Call Forwarding Always
Useful for important numbers where Disaster Recovery scenarios are important. The Reseller or a Group Administrator can access the Business Portal to divert the Auto Attendant to another number and/or location.
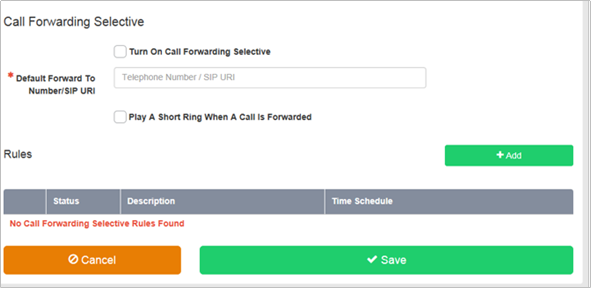
Call Forwarding Selective
Allows granular call forwarding based on either or Holiday and Time Schedules, as well as a telephone number. Forward calls based on a Holiday and/or Time Schedule to another destination, which is very useful if your customer requires after hours calls to be handled by on call personnel. Alternatively, forward VIPs based on their incoming CLI to another group or a supervisor.
Alternatively, forward VIPs based on their incoming CLI to another group or a supervisor.
Do Not Disturb
Do Not Disturb can be set on the selected Auto Attendant which will block all inbound calls and play a busy tone back to the caller. Do Not Disturb will take precedence and override any other call forwarding feature or other Auto Attendant settings.

Please note, the Play A Short Ring When A Call Is Blocked feature is not active within a Auto Attendant so please do not select.
Selective Call Acceptance
Using the incoming CLI of the caller and the Time Schedule, if one is applied, Selective Call Acceptance determines which incoming numbers are allowed to call the Auto Attendant. Only numbers in the list will be answered by the Auto Attendant users. Callers from all other numbers will be presented with a system announcement informing them that the number they are trying to reach is not accepting calls. A Time Schedule can be applied to only accept calls during certain time periods.

Selective Call Rejection
Using the incoming CLI of the caller and the Time Schedule, if one is applied, Selective Call Rejection performs a call screen function that determines which incoming numbers are not allowed to call the Auto Attendant. Prevent your Auto Attendant users from receiving nuisance calls from known numbers ensuring that they are available for customers. Numbers in the list will not be answered by the Auto Attendant users. Callers will be presented with a system announcement informing them that the number they are trying to reach is not accepting calls. A Time Schedule can be applied to only reject calls during certain periods.

Voicemail
Attach a voicemail box to an Auto Attendant and allow certain call types/conditions to be forwarded to a dedicated voicemail box and avoid missing customer calls.
Incoming calls to the Auto Attendant are sent to voicemail once they meet the criteria set by the administrator from within the Auto Attendant voicemail settings page on the Business Portal. The caller is then played a greeting, system or personal, and once they have left a message they can hang up the phone to leave the message. For further options they can press # to access the following options:
- Record the message again – press 1
- Review the message – press 2
- Deposit the message – hang-up the phone
The maximum length for a single voicemail is 5 minutes.
Voicemails are stored on the IC-Talk 3 voicemail server and converted to an mp3 file if forwarded to an email address. Where a voicemail is elected to be sent to an email address, this is as a carbon copy, and the original will stay on the server until deleted by the administrator. Alternatively the administrator has two further options:
- Auto Delete – selecting this will delete the oldest voicemail if a new one comes in and the voicemail box is at capacity.
- Email voicemails only – selecting this will automtically remove voicemails from the server, ensuring there is always space for new voicemails.
Administrators can choose to manually delete messages by using the following method:
- Directly from the Business Portal Auto Attendant voicemail page
The maximum storage capacity per voicemail box is 30 minutes.
When the administrator receives a new voicemail, they can be notified by the following means:
- Business Portal – the Auto Attendant Voicemail page will display total number of Read and Unread voicemails.
- Voicemail-to-email – the administrator can choose to have the voicemail immediately emailed over as an mp3 file.
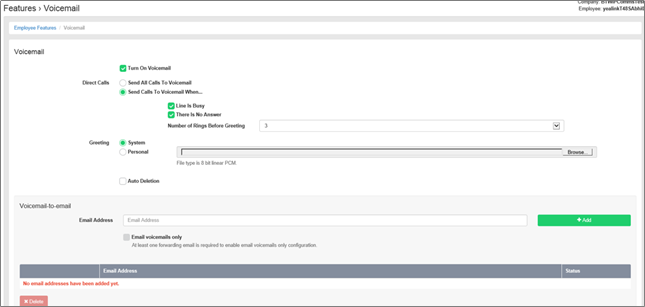
To turn on Voicemail, simply check the Turn on Voicemail box.

Feature settings from the Business Portal
To configure what happens when a call is placed into the Auto Attendant, select from the following:
- Send All Calls To Voicemail – this will put all calls immediately to voicemail
- Send Calls To Voicemail When...:
- Line Is Busy – if all agent are busy then the call will be sent to voicemail
- There Is No Answer – if no one picks up after the set amount of rings set in the Hunt then calls will overflow to voicemail
- Greeting:
- System – uses a standard system generated greeting that will be played to callers
- Personal - upload a personal greeting using the Choose file button.
- Auto Deletion - where Voicemails are retained on the platform, an option is available to delete the oldest voicemail if a new one comes in and the box is at capacity.
- Voicemail-to-email - Enter an email address/s, followed by the + button, to have voicemails sent as a MP3 to a user’s or a central voicemail box. Please note, only a Company Admin or Group Admin can see this setting currently, CP Admins are unable to configure this.
- Email voicemails only – selecting this will automtically remove voicemails from the server, ensuring there is always space for new voicemails.
Accessing Voicemails from the Business Portal
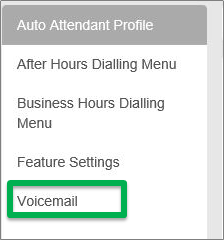
A Company or Group Administrator can use the visual voicemail service to manage the Auto Attendant voicemails via the Business Portal. Click on Voicemail from the right-hand side within the Auto Attendant Profile box.
From here they can see a list of all Voicemails along with:
- Calling Number – details the calling number that has left the voicemail
- Type – determines if this is a Voicemail or a Fax Message (where enabled)
- Message – choose to play the voicemail through your PC speakers, pause it, stop it and advanced forwards and backwards throughout the message
- Time – date and time stamps of when the voicemail came in
- Duration – displays in seconds the length of the voicemail

The administrator can choose to do the following with the Business Portal audio file:
- Listen to message
- Stop the message
- Pause the message
- Scroll back through the message
- Scroll forward through the message
- Repeat the message
- Delete the message (this will remove the message from the voicemail server)
Accessing Voicemails from Email
If the setting is selected in the feature setting, then voicemails will be sent to a nominated email address/s. The user can choose to do the following with the MP3 audio file:
- Listen to message
- Repeat the message
- Erase the message (this will only erase from the email account)
- Store the message locally or upload to a CRM system
- Forward the message to another email recipient


